Build Your Own VPN on a VPS — From $2.5/Month
Why Indie Developers Need a VPS
A VPS (Virtual Private Server) is just a Linux machine running in the cloud with root access that's entirely yours. For someone shipping products solo, it earns its keep in more ways than one:
- Deploying your own products and backends — my early EMQX message broker, Postgres databases, and internal tool sites all ran on machines exactly like this.
- Latency testing close to users — when building for overseas markets, spin up servers in several regions, measure real latency from each, pick the best location for your users, then delete them all.
- Scheduled jobs and crawlers — demand research and data-collection scripts don't belong on your laptop. Put them on a VPS and they run 24/7.
- A network path you fully control — for development, testing overseas services, and general browsing, you want a connection that's stable, private, and answerable to nobody but you. Off-the-shelf VPNs are either slow, untrustworthy, or priced per-person-per-month. Self-hosting is the sanest answer.
Why Vultr
I've used Linode, DigitalOcean, and Hetzner. My daily driver is still Vultr, for blunt reasons:
| Provider | Min price | Billing | Regions | Good for |
|---|---|---|---|---|
| Vultr | $2.5/mo | Hourly | 32 | Flexible spin-ups, latency testing |
| DigitalOcean | $4/mo | Monthly | 14 | Best-in-class docs |
| Linode | $5/mo | Monthly | 11 | CPU-heavy workloads |
| Hetzner | €3.99/mo | Monthly | 6 | Extreme value |
Vultr's three killer features:
- Hourly billing: spin one up for a test, destroy it in one click, not a cent wasted. This matters hugely for indie devs — you can run servers in several regions at once to compare latency, then delete them all.
- Global regions: Japan, Singapore, US, Europe. For overseas products, picking the nearby region cuts latency dramatically.
- Alipay supported: easy top-up from China, no virtual credit card needed.
Paid VPN vs Free VPN vs Self-Hosted
| Option | Cost | Privacy | Stability | Control |
|---|---|---|---|---|
| Commercial paid VPN | Per person, per month — adds up | Depends on vendor promises | Depends on peak hours | Low |
| Free VPN | $0 | Bad (many monetize your data) | Poor | Low |
| Self-hosted (this post) | $2.5–5/mo | Entirely yours | Dedicated bandwidth | Full |
The only cost of self-hosting is the setup time. Once it's up, every client platform connects, and you own the node, the protocol, and the port. That's why I recommend it.
Step 1: Buy the VPS (from $2.5/month)
1. Register at Vultr
Sign up at vultr.com and verify your email. One heads-up: new accounts sometimes get asked for ID verification at first top-up — just upload the document and you're through.
2. Create an Instance
In the console, click Create Instance to enter the setup wizard.
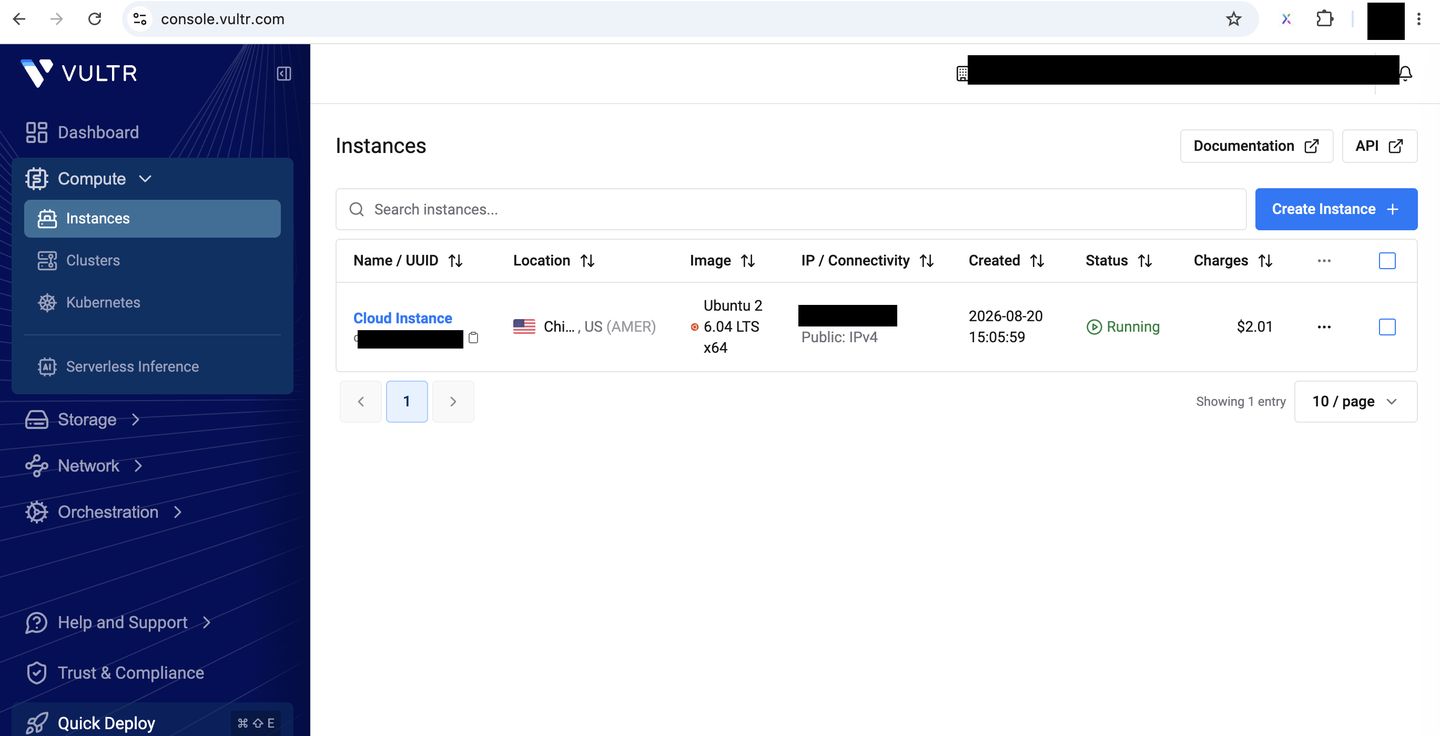
3. Pick a Plan
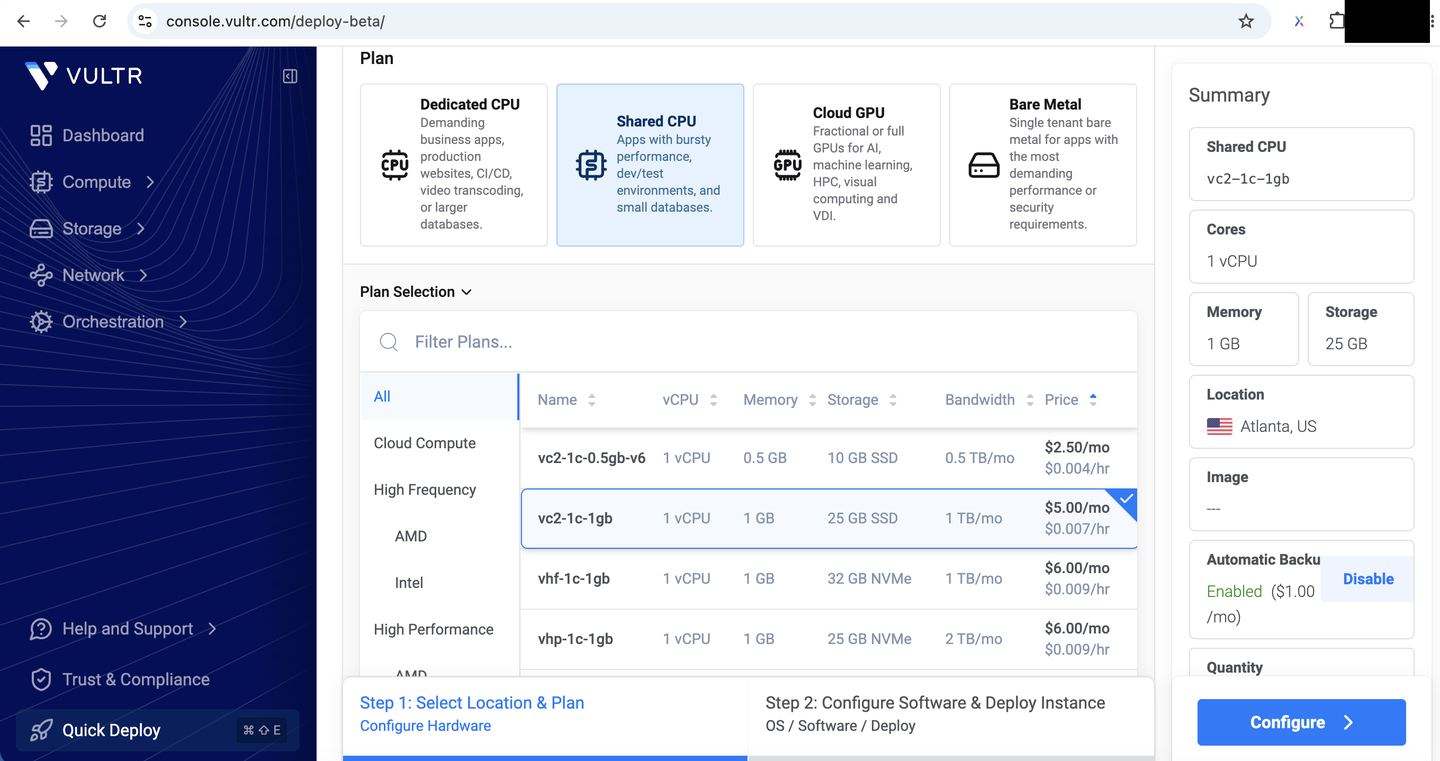
Choose Cloud Compute → Shared CPU. The entry tier — 1 vCPU / 0.5 GB — is $2.5/month; personally I recommend 1 vCPU / 1 GB (vc2-1c-1gb) at $5/month, which leaves comfortable headroom for a proxy plus light services.
4. Pick a Region
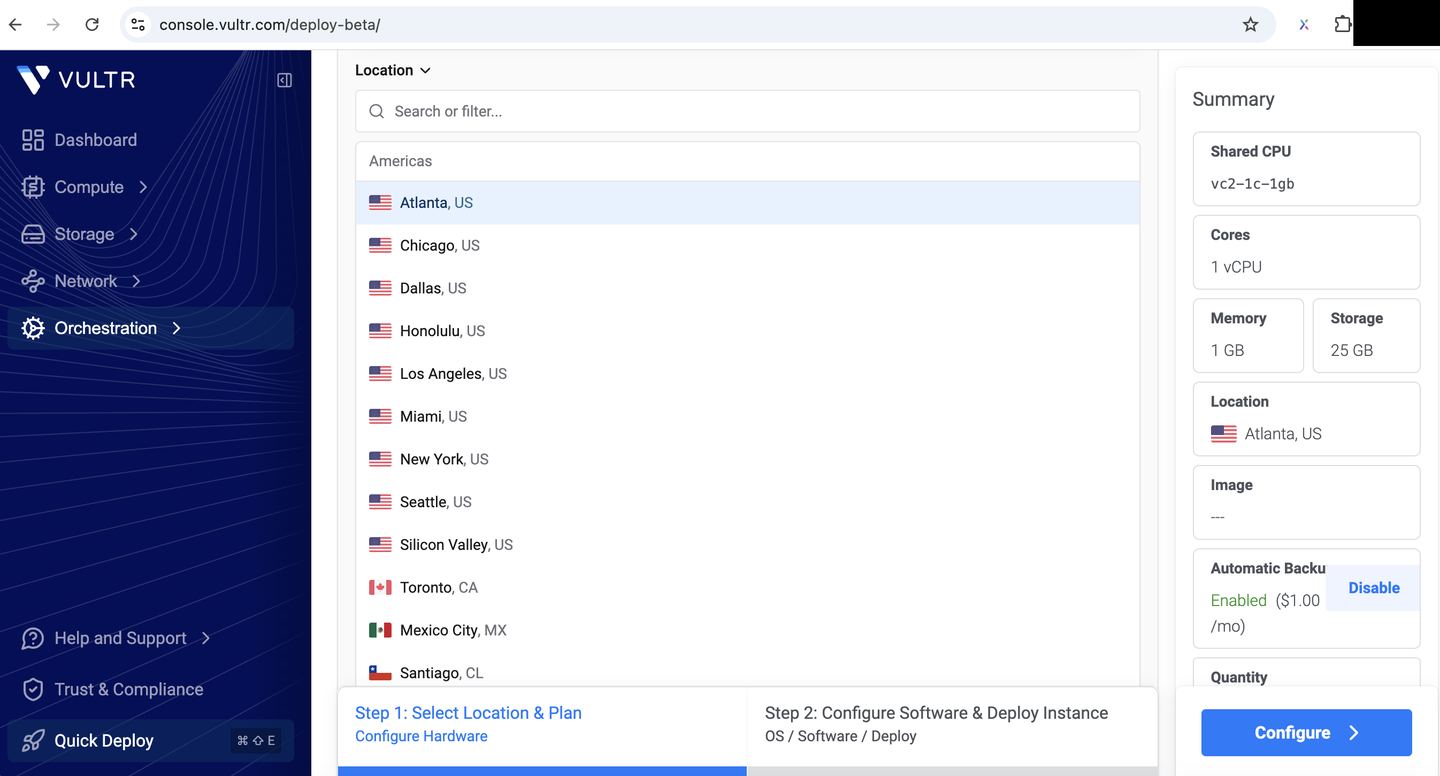
Choose by need. It's also where the "test near your users" trick pays off. For a personal proxy I recommend the US — Chicago or Los Angeles are solid picks.
5. Pick an OS
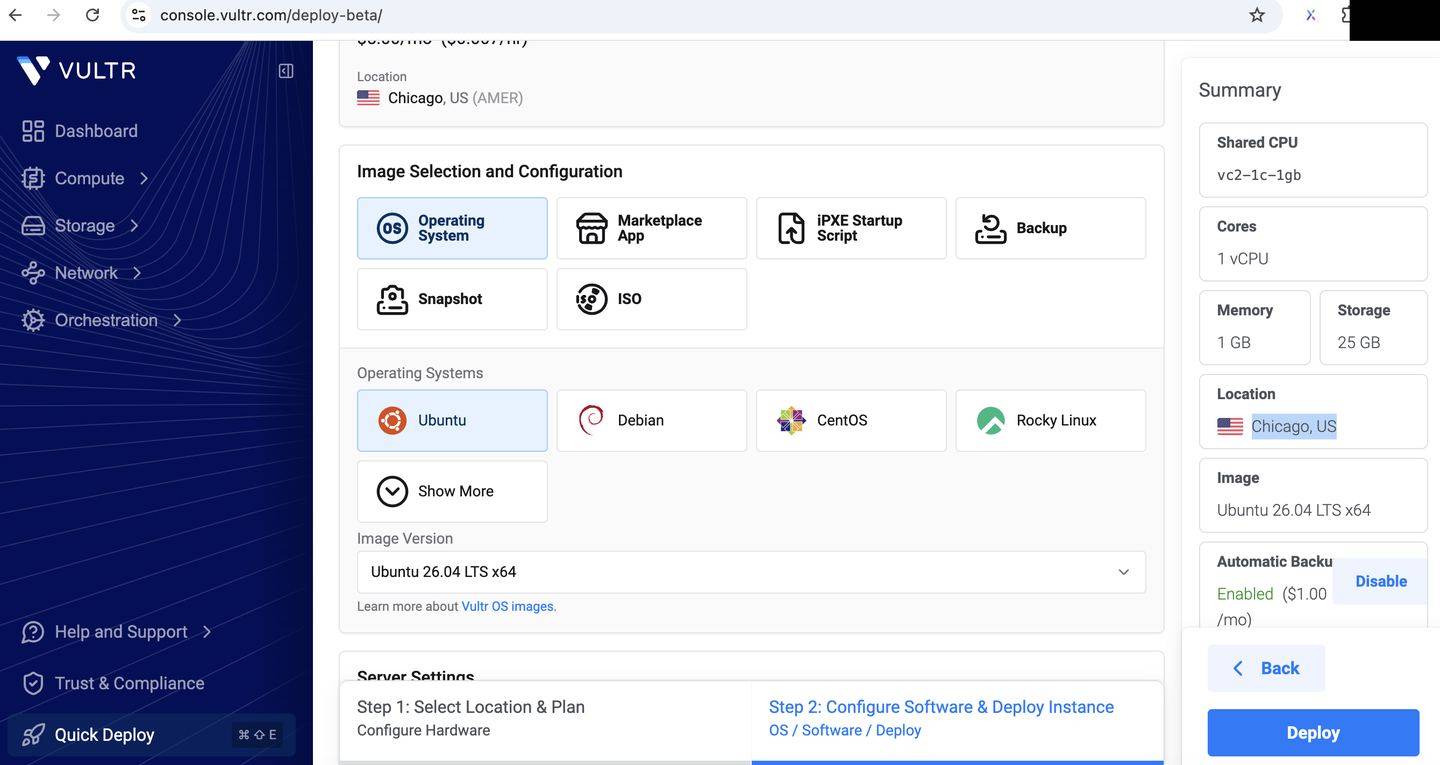
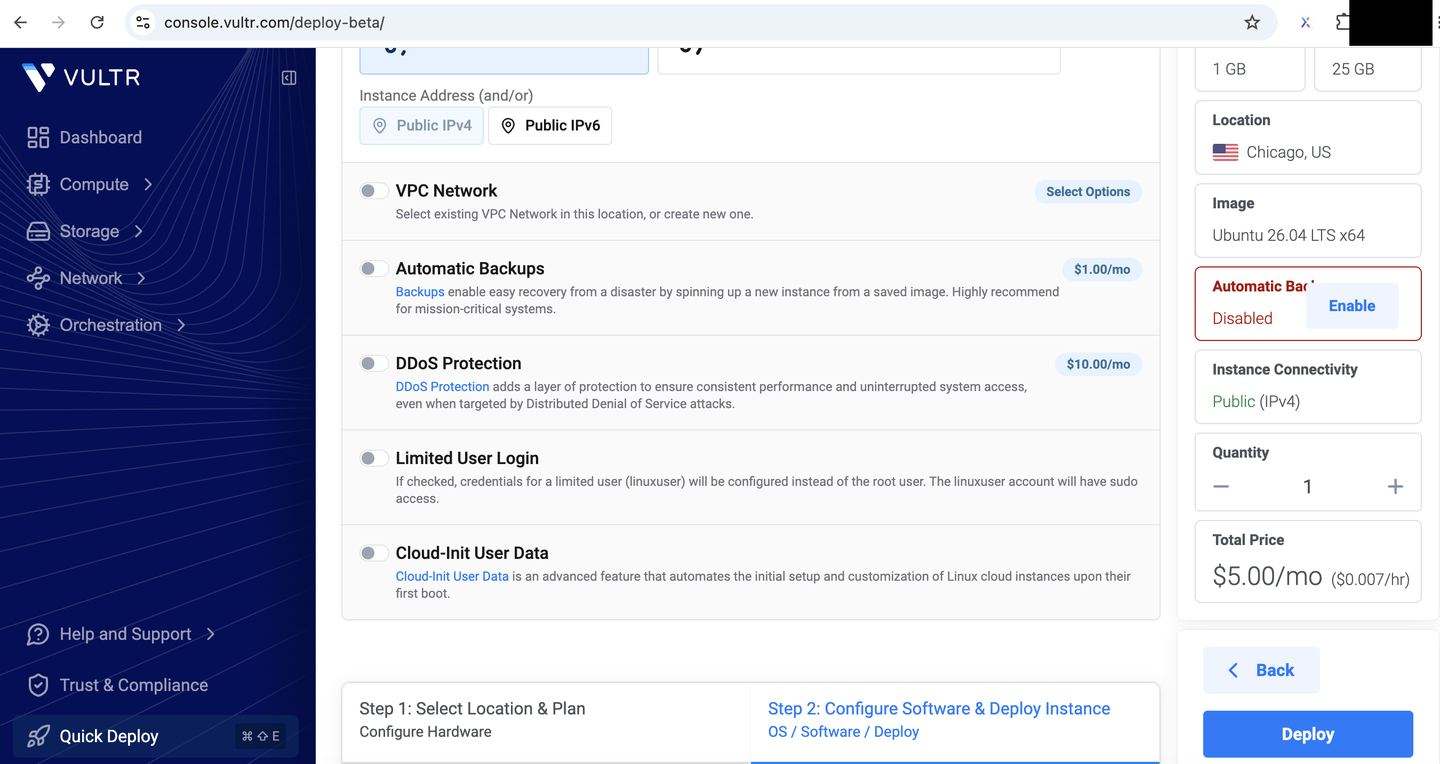
Choose the latest Ubuntu LTS — in my case Ubuntu 26.04 LTS x64 (shown in the screenshot). LTS means long-term support, the best documentation ecosystem, and the fewest surprises with install scripts.
6. Everything Else
Most remaining options can stay blank. One to watch:
- Automatic Backups adds $1/month. For a VPN box you don't need backups, so I turned it off.
Confirm and the total shows in the bottom-right corner — $5/month for my setup. Billing runs hourly/monthly from your balance; that part's self-explanatory.
7. Get Your IP, Username, and Password
Once deployment finishes, the instance appears on your dashboard. Click into Server Details to find the public IP, the Username (default root), and the Password (click the eye icon to reveal it, or set your own).
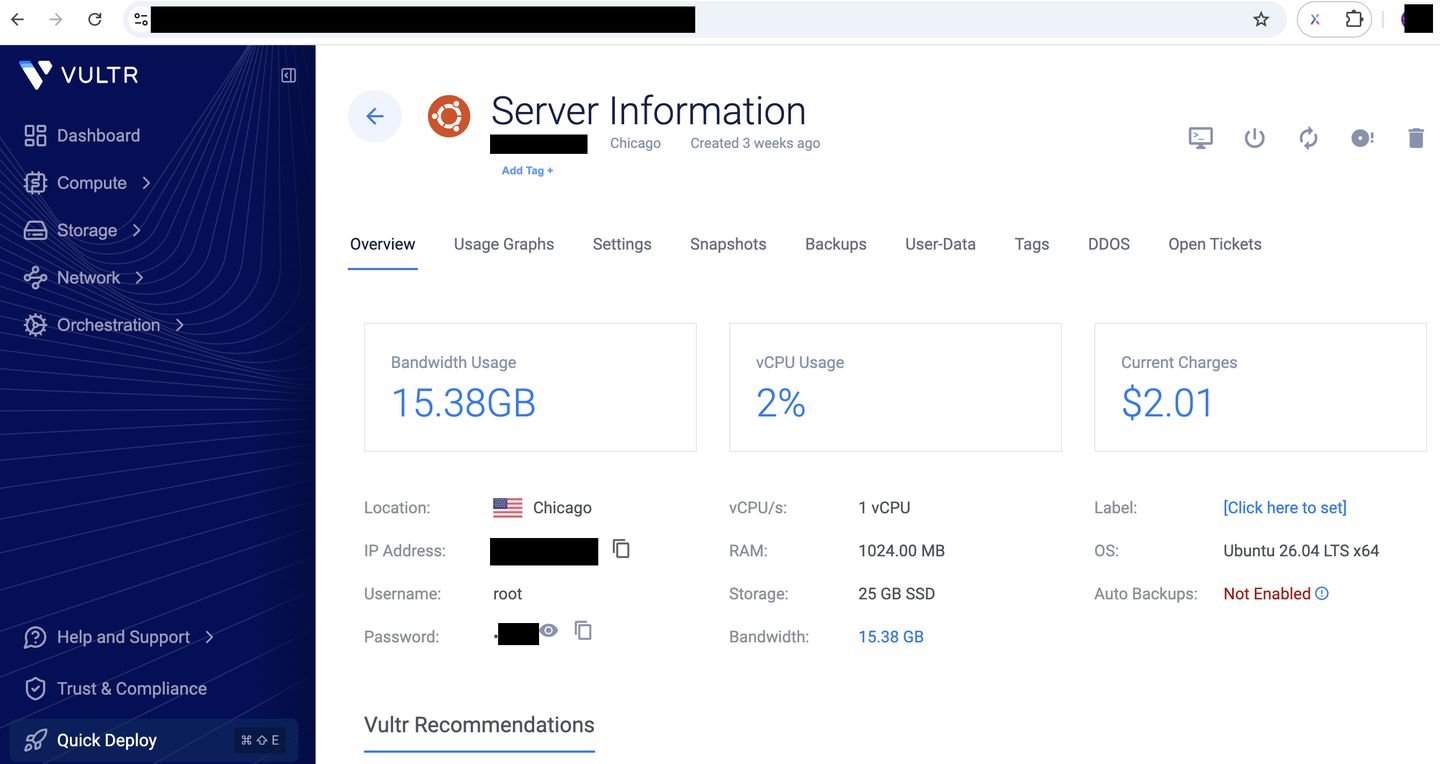
At this point you own a remote Linux machine you can SSH into.
Step 2: Set Up the VPN on the Server
There are plenty of one-click VPN installers on GitHub. The one I used is chugzb/VPN, and I chose the VLESS + Reality protocol — the strongest stealth option in 2026, the top-tier choice for a personal tunnel: it masquerades as ordinary HTTPS traffic on port 443.
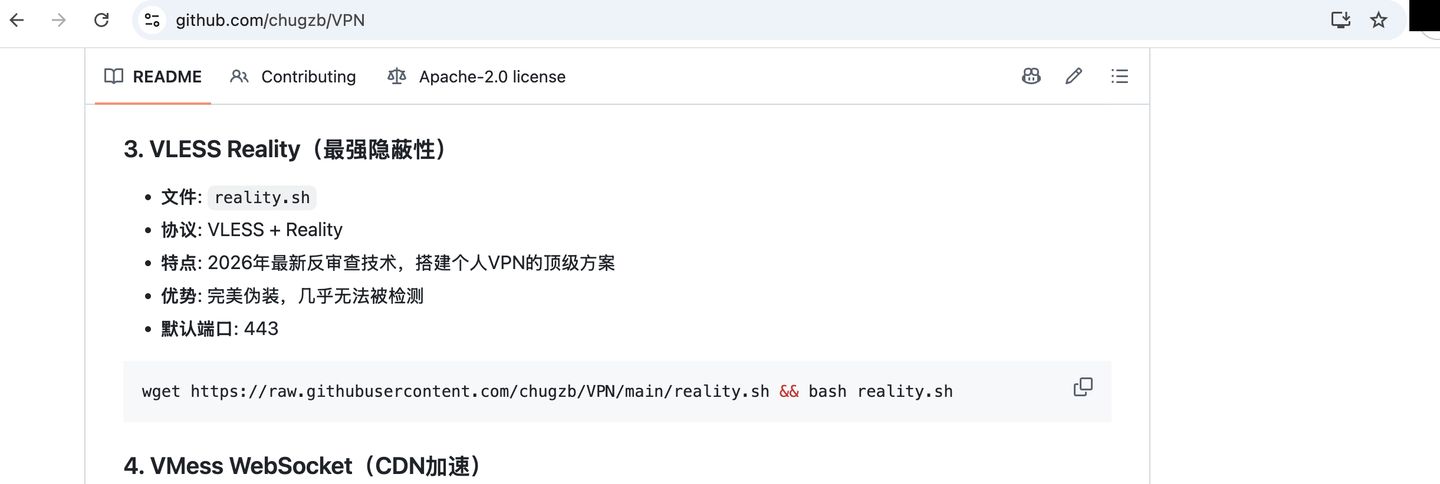
SSH into the server and run the script — it goes end to end without interaction and prints a vless:// connection URL at the end. Copy that URL.
Android: v2rayNG
On Android, grab the APK from 2dust/v2rayNG Releases (e.g. v2rayNG_2.3.8_arm64-v8a.apk).

After installing, just copy the vless:// URL to your clipboard and open the app — it imports the config automatically. Tap connect.
macOS: V2rayU
The Mac client is V2rayU — get the latest build from its GitHub Releases page. The setup walkthrough I followed is at v2rayu.org.
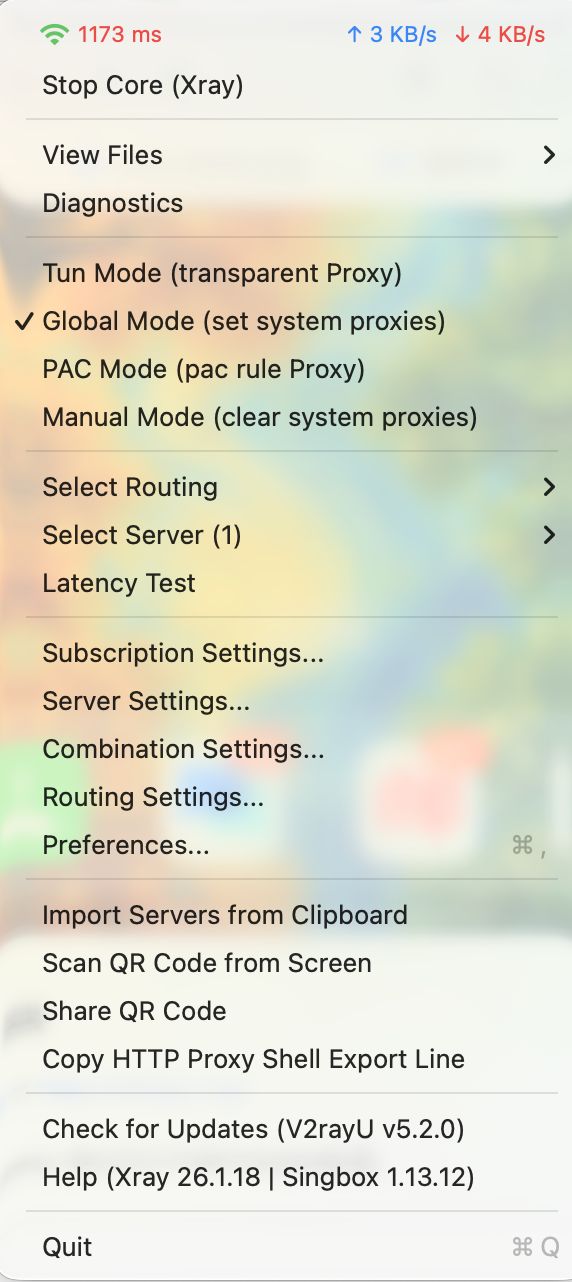
Same trick: copy the vless:// URL, open the app, and it auto-detects and imports the config. Tick Global Mode (or PAC Mode for split routing) in the menu bar and the system proxy is live.
Wrapping Up
- A $2.5/month (or $5) Vultr box plus one install script = a cross-platform network tunnel you fully own.
- Beyond the VPN, that same machine can deploy your products, run your scheduled jobs, and test latency near your users — indie dev gets a lot less "winging it" once you have a VPS of your own.
- Only two friction points worth remembering: first-time ID verification for new accounts, and backing up the "Auto Backups cost $1/mo" checkbox off.
Questions or want to talk indie dev? Get in touch.
Related Posts
Want to chat about indie dev or collaborate? Let's talk →
Get in Touch